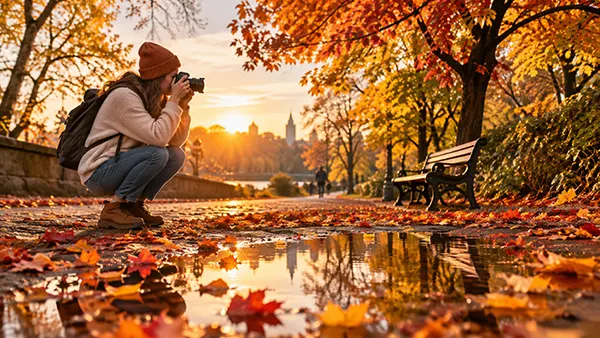
Photo Walks as a Hobby: 10 Autumn Subjects for Outings with a Camera or Smartphone
An autumn photo walk gives an ordinary trip through a park, neighbourhood or town centre a clear purpose without turning photography into a complicated technical exercise. The season changes familiar places almost daily: leaves move from green through yellow and orange to deep brown, rain creates reflections on pavements, cooler mornings bring mist, and earlier sunsets change the character of streets and buildings. A camera is useful, but it is not essential; a smartphone that you already carry can handle most of the subjects described here. The aim is not to return with hundreds of nearly identical pictures, but to notice ten specific types of scene and make deliberate photographs of them. Working with a small set of subjects also makes the hobby easier to maintain. You can repeat the same route a week later, compare how the light and colour have changed, and gradually build a photographic record of autumn rather than a folder of unrelated snapshots.
Start with the Small Details That Give Autumn Its Character
Subject one is fallen leaves, but the strongest photographs usually come from looking beyond a simple pile of yellow foliage. Search for colour transitions, isolated leaves on contrasting surfaces, repeating shapes and small arrangements created naturally by wind and rain. A red maple leaf on dark wet tarmac can have more visual impact than an entire tree because the viewer immediately knows where to look. Fallen leaves also work well on stone steps, wooden benches, drain covers and paths where straight human-made lines contrast with irregular natural shapes. Try photographing the same arrangement from standing height and then from close to ground level. With a phone, tapping directly on the most important leaf will normally place focus where you need it. With a camera, a standard or short telephoto lens can help simplify the background. Avoid collecting every colour into one frame; two or three dominant tones often produce a cleaner photograph than a scene containing everything at once.
Subject two is the collection of smaller seasonal details that appear beneath trees and hedges: acorns, conkers, seed heads, pine cones, berries and curled dry leaves. These objects are useful when the wider landscape looks untidy or the sky is flat and grey because they allow you to work with a very small area. Look for groups with a clear pattern or one object that differs from the others. Three brown conkers beside a single yellow leaf, for example, already create a simple visual relationship. Soft overcast light is particularly helpful for this type of photograph because it reduces harsh shadows and keeps surface detail visible. If your phone or camera offers a close-focus or macro function, use it only when it genuinely improves the composition; moving extremely close is not automatically better. Leave enough surrounding space to show where the object lies. It is also better to photograph natural arrangements as you find them rather than stripping plants or disturbing woodland simply to construct a picture.
Subject three is reflections in puddles and other wet surfaces. Autumn rain can temporarily turn an unremarkable pavement into one of the most useful photographic locations on a route. Instead of photographing the puddle itself, change your position until it reflects a tree, church tower, street lamp, colourful façade or person passing by. A lower viewpoint usually increases the amount of reflected scene visible in the water. You can make the reflection the main picture, include both the real subject and its mirrored version, or turn the frame upside down later so that the reflected scene initially appears normal. Wet paving stones are also worth watching even when there is no clear puddle: they pick up warm shop lights, traffic lights and the colours of leaves. Keep the lens dry and clean, particularly on a smartphone that has been in a pocket. One small water mark on the lens can soften bright lights across the whole image, which is easy to mistake for poor focus.
Use Mist and Rain Instead of Treating Them as Bad Weather
Subject four is autumn mist. It can simplify a crowded location because distant trees, buildings and hills gradually lose contrast, allowing nearby shapes to stand out. Parks, rivers, canals, fields and tree-lined roads are particularly suitable, although even a familiar suburban street can look completely different on a misty morning. Instead of trying to include everything, use one clear foreground feature such as a bench, lamp post, cyclist or tree trunk and allow the mist to create layers behind it. Paths and fences are useful because they lead the eye naturally into the pale background. Morning conditions can change quickly, so it is worth deciding on a location before leaving home rather than spending the best part of the light searching for somewhere to stand. Keep a little distance between major objects in the frame; when trees or people overlap too closely, the scene can become visually confusing despite the simplicity created by the mist.
Subject five is rain itself and the visual traces it leaves on glass, metal and stone. A photograph through a rain-covered café window can combine sharp droplets in the foreground with soft street colours beyond, while droplets on leaves allow you to concentrate on very small details. After dark, wet streets can reflect headlights, shop windows and street lamps, giving you more colour than the same location would offer on a dry evening. You do not need to stand in heavy rain to get these pictures. Covered arcades, bus shelters, station entrances and windows provide sheltered viewpoints from which the weather remains part of the photograph. When photographing through glass, move the lens reasonably close to the surface to reduce unwanted reflections from behind you. If you want the droplets to dominate, focus on the glass; if the street scene matters more, focus farther away. That single decision can produce two noticeably different photographs from the same position.
Bad weather also encourages a slower style of photo walk, which can improve the results. Instead of continually moving towards the next location, stay in one sheltered place for several minutes and watch how people, traffic and light pass through the frame. If the sky is very bright compared with the ground, avoid automatically making the entire photograph brighter; preserving the atmosphere of a grey day is often more convincing than forcing the image to resemble sunshine. A small lens cloth is one of the most useful items to carry in autumn because water droplets and condensation can affect both cameras and phones. Keep equipment inside a bag or coat when you are not using it, and check the manufacturer’s guidance before exposing any device to rain because resistance to water varies considerably. The photograph is never worth risking damaged equipment or standing in an unsafe position beside traffic, slippery banks or fast-moving water.
Photograph the People and Places That Change with the Season
Subject six is everyday autumn street life. Coats, umbrellas, boots, bicycles, fallen leaves and earlier evening light make public spaces look noticeably different from their summer versions. Rather than asking strangers to pose, you can often build a stronger photograph around gestures and movement: someone crossing a leaf-covered square, two people sharing an umbrella, a cyclist passing beneath yellow trees or a figure waiting at a bus stop during rain. Give moving people space in front of them so the composition does not feel cramped. Backgrounds matter just as much as the person, so check the edges of the frame for bins, signs, parked vehicles or bright objects that draw attention away from the main action. If you want a recognisable portrait of someone, asking permission is usually the most considerate approach. For more general street scenes, avoid making vulnerable or distressed people the subject of a photograph, and respond politely if somebody clearly does not want to be photographed.
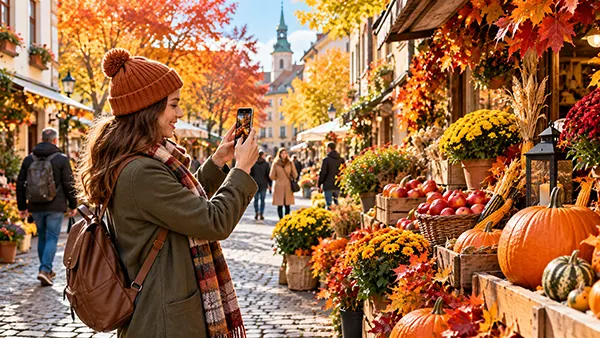
Subject seven is seasonal activity around markets, cafés, bakeries and small local events. Autumn provides useful combinations of people, produce, steam, warm interior light and cooler outdoor surroundings. A market stall containing apples, pumpkins or late-season flowers can work as a close composition, while a wider view can show customers, awnings and the surrounding street. Cafés become especially photogenic near dusk when illuminated interiors contrast with blue-grey outdoor light. Photographing from outside can show both the window display and reflections of the street, creating several layers without any special equipment. Look for ordinary actions rather than waiting for a dramatic moment: a barista arranging cups, somebody carrying shopping through rain or hands passing produce across a stall can give the picture a clear human element. Where a market, café or event is on private premises, respect its photography rules, and ask before making close photographs of staff or customers if your presence is likely to be noticeable.
Subject eight is architecture framed by autumn foliage. This works with grand historic buildings, but it can be just as effective with houses, footbridges, libraries, railway stations and familiar street corners. Instead of standing directly in front of the building, move until a branch or group of coloured leaves occupies one edge of the photograph. The foliage then acts as a natural frame and makes the season immediately clear without hiding the architectural subject. Another option is to photograph repeated windows or a strong façade with one brightly coloured tree interrupting the regular pattern. Cloudy weather can suit brick and stone because the light is even, while low sun adds long shadows and warmth. Keep vertical lines reasonably straight when the building is the main subject; if your phone provides a level or grid, it can help with alignment. More importantly, walk a few metres left or right before taking the picture. A small position change can separate overlapping branches, signs and rooflines far more effectively than later editing.
Add Wildlife and Movement Without Turning the Walk into a Chase
Subject nine is the wildlife already using parks, gardens, rivers and urban green spaces. Birds searching through leaf litter, squirrels moving between trees and water birds on canals or ponds can add life to a photo series without requiring dedicated wildlife equipment. The simplest method is often to choose a place where animals naturally appear and wait rather than following them continuously. Watch the direction of the light and try to keep a relatively uncluttered background behind the animal. With a smartphone, use the optical camera option intended for a longer view if your device has one rather than relying on extreme digital enlargement. With a camera, a longer lens allows more distance, but the same principle applies: position and patience matter more than filling every millimetre of the frame. Do not bait, touch, corner or deliberately disturb wildlife for a photograph. If an animal changes its behaviour because you have moved closer, increase the distance.
Movement can also make these scenes more expressive. A perfectly sharp bird on a pond is one option, but ripples, falling leaves and people walking through the background can communicate the atmosphere of a real autumn afternoon. If your camera allows easy control of shutter speed, a faster setting can help with an active animal, while a slower one can deliberately allow some movement to blur. Smartphone users can work more simply by using a burst, action or motion feature when available and selecting the strongest frame afterwards. Avoid continuous zooming while the subject moves; it is usually easier to choose a composition, wait for the subject to enter it and then take several photographs. This approach works just as well for cyclists, dogs being walked or leaves blowing across a path. The goal is not merely to freeze movement, but to decide whether sharpness or visible motion better describes what you saw.
Patience is especially valuable when photographing both people and animals. A location that seems empty can change within a minute when a person in a bright coat enters the scene, a bird lands on a railing or a gust of wind sends leaves across the path. Before pressing the shutter, look at the entire frame rather than only the moving subject. Check whether a tree appears to grow from somebody’s head, whether another person is cut awkwardly at the edge or whether a bright sign dominates the background. Taking a second or third version after making a small adjustment is often more useful than taking twenty identical frames from the same spot. This is one reason photo walks work well as a hobby: there is no need to rush from one attraction to another. A short route photographed attentively can provide a more varied and coherent set of pictures than a long walk completed at speed.
Plan the Walk Around Light and Build a Complete Autumn Photo Story
Subject ten is the transition from late-afternoon light through sunset into the early evening. In autumn, the shorter days make this easier to include in an ordinary walk because you do not need to stay outside until very late. Begin when the sun is lower and look for paths, walls, rows of trees and people casting long shadows. Warm light on yellow or orange foliage can strengthen colour, but it is worth turning in the opposite direction as well; softer light away from the sun often suits portraits, buildings and quieter street scenes. After sunset, continue for a short period as artificial lights become visible while some colour remains in the sky. Windows, lamps, buses and shopfronts then provide small warm areas against cooler surroundings. If your phone or camera has a low-light mode, use it when needed, but hold the device steadily and allow moving people to become part of the evening atmosphere rather than expecting every frame to look like daylight.
A good photo walk does not require an ambitious destination. A route of a few streets, a local park, a canal path or the area around a railway station can provide all ten subjects if you pay attention to changes in scale. Plan a simple loop so you are not constantly checking directions, then consider where you are likely to find trees, water, active streets and sheltered places. Weather can guide the choice: after rain, prioritise reflections; on a clear afternoon, look for long shadows; on a misty morning, choose open paths or water. Returning to the same route several times during September, October and November can be more useful than continually travelling somewhere new. The same tree may move from green to gold and then bare branches, while the time of sunset and the activity around a street can change substantially. Repetition gives the hobby continuity and provides a visible record of the season progressing.
Think of the photographs as a small series rather than individual trophies. A useful set might begin with a wider view that establishes the location, move towards medium-distance street or park scenes, include several close details and finish with an evening photograph. Variety in distance and orientation helps the collection feel intentional even when every picture was taken within a small area. Avoid keeping five almost identical images simply because all of them are technically acceptable. Choose the one in which the subject, light and background work together most clearly. It can also be useful to include quieter frames: an empty wet bench, leaves gathered against a kerb or a single illuminated window can create pauses between busier photographs. Over time, these ordinary details may become more interesting than obvious seasonal scenes because they show what a particular neighbourhood actually looked and felt like during that autumn.
Keep Camera and Smartphone Technique Simple and Repeatable
For a smartphone photo walk, start with a clean lens and the normal camera mode before reaching for specialised settings. Turn on a grid or level if your device provides one, because it can help with horizons, buildings and balanced placement of subjects. Tap the area that matters most when the camera chooses the wrong focus or brightness, and reduce brightness slightly if pale skies or illuminated windows are losing detail. Use portrait, macro, night or other dedicated modes only when they suit the scene and are available on your model; there is no need to switch modes for every photograph. Try to use the phone’s main cameras at their normal magnifications rather than enlarging distant subjects heavily on screen. Digital enlargement can always be tempting when a bird or building is far away, but moving to a better position or accepting a wider composition often gives a cleaner result.
With a dedicated camera, the same simple approach works. A single lens is enough for an entire walk and can actually make the outing more enjoyable because you spend less time changing equipment. A standard zoom is convenient for streets, details and wider park scenes, while a small fixed lens can encourage you to change position physically and think more carefully about framing. Automatic or semi-automatic exposure modes are perfectly suitable when photography is a leisure activity rather than a technical test. Pay attention mainly to whether the subject is sharp when it needs to be, whether bright areas still contain useful detail and whether camera movement becomes visible as the light falls. If evening photographs repeatedly blur, stabilise the camera against a railing or wall where safe, use a tripod where appropriate, or choose a setting that allows the camera to capture the scene more quickly.
Finish the photo walk by reviewing the pictures after you return rather than judging everything on a small screen while standing outside. Remove obvious duplicates and mistakes, then look for a set of perhaps ten to twenty images that shows genuine variation in subject, distance, colour and light. Editing can improve brightness, contrast, crop and colour balance, but it does not need to transform an autumn afternoon into something that never existed. Keeping colour reasonably close to the scene makes it easier to compare photographs from different weeks. Save a few favourites from each outing in a dedicated album and note the date or route if you intend to repeat the project. After several walks, patterns become obvious: perhaps reflections consistently work better for you than wildlife, or you prefer quiet details to wide landscapes. That knowledge gives the next outing a purpose and gradually turns casual picture-taking into a hobby with its own rhythm, visual preferences and record of the changing season.